AlpsCraft presents via ferratas 2: equipment and difficulty scale of via ferratas
Table of Contents
he first episode of the via ferrata series was an introduction, now I'm getting down to specifics. Equipment and knowledge of the via ferrata difficulty scale are key elements necessary for exploring them. So - what exactly do you need for traveling the iron ways? Previous episode of my via ferrata series - 1. What is via ferrata and its history
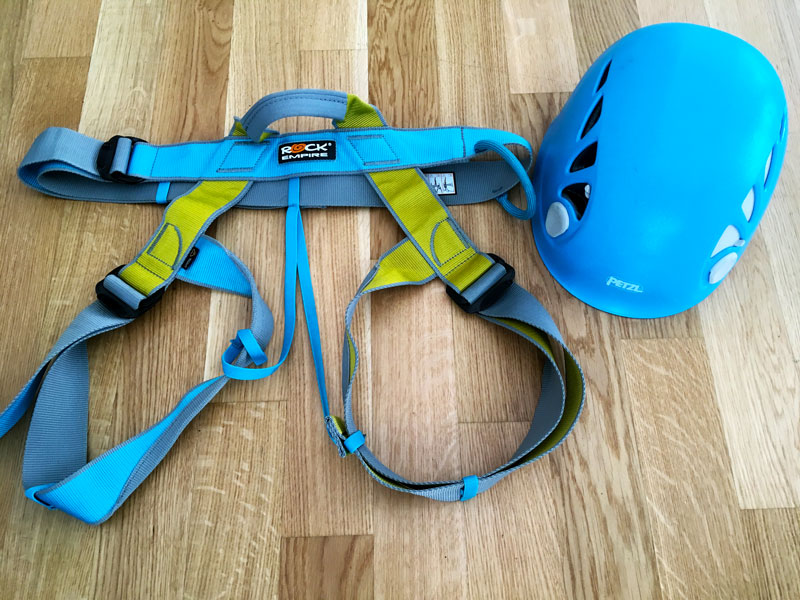
via ferrata harness and climbing helmet
Via Ferrata Equipment
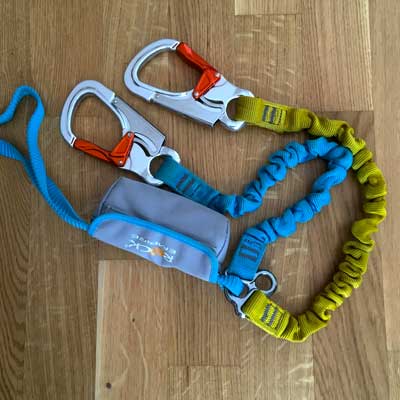
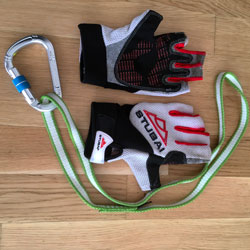
In addition to standard mountain hiking equipment, for via ferratas you need a few essential items. Fortunately, they don't cost a fortune and in this case it's worth buying gear from a proven mountain brand. The basic element is a harness. It can be a normal climbing harness, or a special one for via ferratas - lighter. Sit harness or chest harness depends on you and your comfort. It's important that the harness is well-fitted - during a longer expedition, a poorly fitted harness can be a nightmare. With a heavy backpack, a chest harness is supposedly safer, as it reduces the risk of slipping out during a fall and flipping upside down. If you plan to climb in the future, or do high-altitude routes, buy a climbing harness right away. Via ferrata harnesses are lighter, but have significantly fewer applications. A climbing helmet (German: Kletterhelm) with proper ventilation is the last absolutely essential element. And it should be on your head from the very beginning to the end of the via ferrata! Especially the more popular routes are exposed to numerous rock fragments from under the boots of hikers going above us.via ferrata lanyard The so-called lanyard (German: Klettersteig Set) is another crucial part of the set for our safety. It consists of, among other things, a shock absorber, whose task is to take the main impact in case of falling from the wall. WARNING: Via ferratas are not climbing, where falling from the wall is commonplace. On via ferratas you don't fall, each fall makes your lanyard useless. This is very important!gloves and sling with carabiner Generally, buy new equipment, it's not a huge expense - a reasonably decent set can be obtained for up to 600 PLN. It's important that it has the appropriate certifications, so it's worth sticking to known mountain brands. In addition to standard via ferrata equipment, it's also worth having special, reinforced gloves. On longer or more difficult routes, our hands can really take a beating. For more serious expeditions, an invaluable addition will be a sling with carabiner (if it's not already built into the lanyard). We can hang on it and rest from time to time. A really useful gadget!
Via Ferrata Difficulty Scale
Another very important element in this via ferrata puzzle is knowledge of the difficulty scale. Thanks to it, we can optimally choose a route according to our abilities. Each via ferrata has a so-called topo, which can usually be easily downloaded from the internet and printed. It's a pictorial plan of the entire via ferrata with marked difficulty of individual elements. The final difficulty of the via ferrata is often equal to the rating of the most difficult section. But this is not always the case. Sometimes the via ferrata itself is easier, but has a higher rating due to a long approach or descent. Or lack of emergency exits, or sun exposure. It's worth reading the description carefully and analyzing it thoroughly! The matter of the difficulty scale itself is not as simple as it might seem. As sometimes happens -
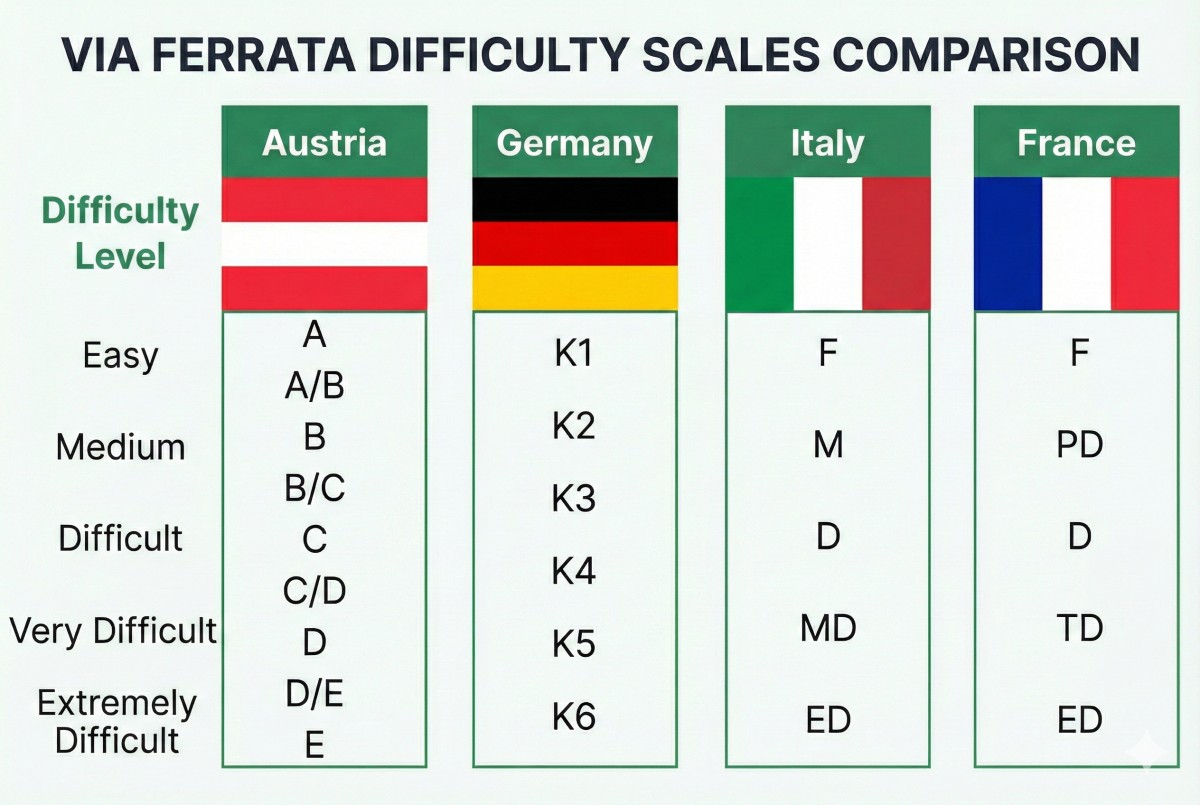
different strokes for different folks! And unfortunately, each Alpine country has its own scale. I use the one I know best - the Austrian one. And I'll explain that one in more detail now. Below you have a comparison of scales in individual countries:
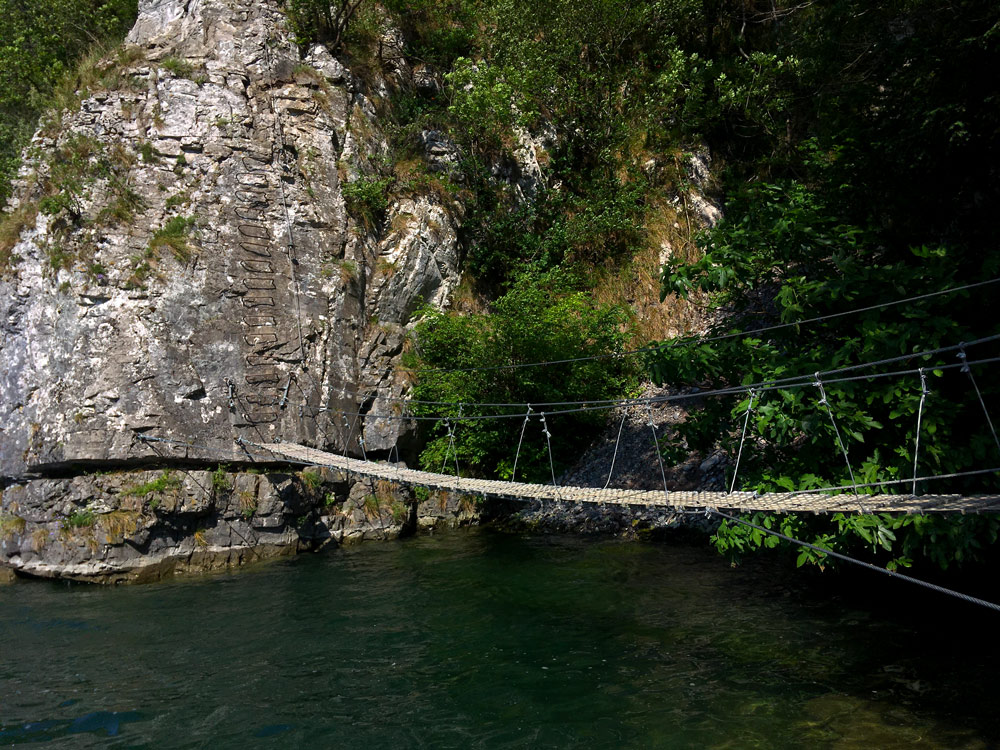
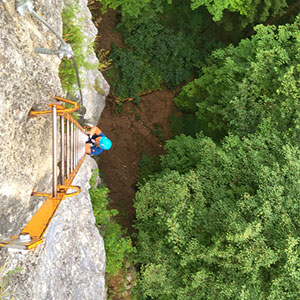
Now I'll explain each level of the via ferrata difficulty scale. I'll use the scale used in Austria. In the table above you also have highlighted combined grades, e.g. B/C, which may mean that generally the via ferrata is difficulty B, but has some short C moments. Once again, I remind you about careful analysis of the description! A - easy. Often this is how a regular trail with places of greater exposure is marked, or a few short ladders or chains. Usually on routes of this difficulty, equipment is not necessary and inexperienced people or children can handle them. B - medium. Here it gets steeper, with steps in the rock, longer ropes or ladders that are steeper. Simple rope bridges are possible. On routes of this difficulty, places begin to appear where the use of hand strength is needed. Even experienced hikers should use protection. For beginners or children, the use of an additional safety rope is recommended.this is a typical section of difficulty C. Here you really need to be carefulC - difficult. Here the fun ends. A route of this difficulty can be dangerous for inexperienced people or those without fitness. The distances between staples or holds are greater, and the passage itself sometimes requires considerable hand strength. You definitely need to expect high exposure and elevation gains. Ladders can be long and completely vertical, and rope bridges require considerable balance and concentration. Children and beginners have no business here. D - very difficult. Vertical wall practically throughout the entire length, very few rest points. A small number of auxiliary elements and considerable distances between them. Knowledge of climbing techniques and appropriate movement patterns is necessary, as well as considerable strength. Only for experienced via ferratists, less experienced will need an additional rope as protection. E - extremely difficult. Very long vertical sections, often overhanging. Rare places to rest. Enormous strength and impeccable technique are necessary for this type of route. Only for very experienced athletes. Even good and strong climbers will need additional protection with a rope here. That would be all on the topic of difficulty scale. Familiarize yourself with it well, because it's the key to good route planning!
What's Next?
The third and final post in this series will be a small summary of the knowledge gained so far. And you'll learn to use it in practice. I'll present you with the basic principles of route planning and moving on via ferratas. So be ready! How did you like my post? Or maybe something important was missing from it? Let me know in the comments!
Cookie Settings
We use cookies to analyze website traffic and optimize your experience. You can choose which cookies you allow.
Cookie Settings
We use cookies to analyze website traffic and optimize your experience. You can choose which cookies you allow.
Necessary
Required for the website to function properly. Cannot be disabled.
Analytics
Help us understand how visitors use our website to improve it.